Nervecentre V9.0 Help for Users
Viewing patients on a PIFU pathway
Depending on your permissions, you can view a list of patients on a PIFU Patient Initiated Follow-Up. Allows patients and their carers the flexibility to arrange their follow-up appointments as and when they need them. pathway from Outpatients > Manage > PIFU Lists.
Viewing patients on a PIFU pathway on a mobile
You can't do this on a mobile.
Viewing patients on a PIFU pathway on a desktop
 Viewing a list of patients on PIFU pathways
-
From Outpatients > Manage > PIFU Lists, select your search criteria.
Use the table below to choose your search criteria.
Division
Select a division to search for patients on a PIFU pathway with that division.
Specialty
Select one or more specialties to search for patients on a PIFU pathway with those specialties.
PIFU List
Select a PIFU list to view a specific list of patients on a PIFU pathway.
PIFU Appointment
Select if a PIFU appointment is booked or not.
-
Select .
A table appears.
-
Double-click on a patient to view their PIFU pathways.
From the bottom right of the screen, select to view the patient's PIFU pathways in another window. This allows you to view all the patients on a PIFU list, and a specific patient's PIFU pathways, at the same time.
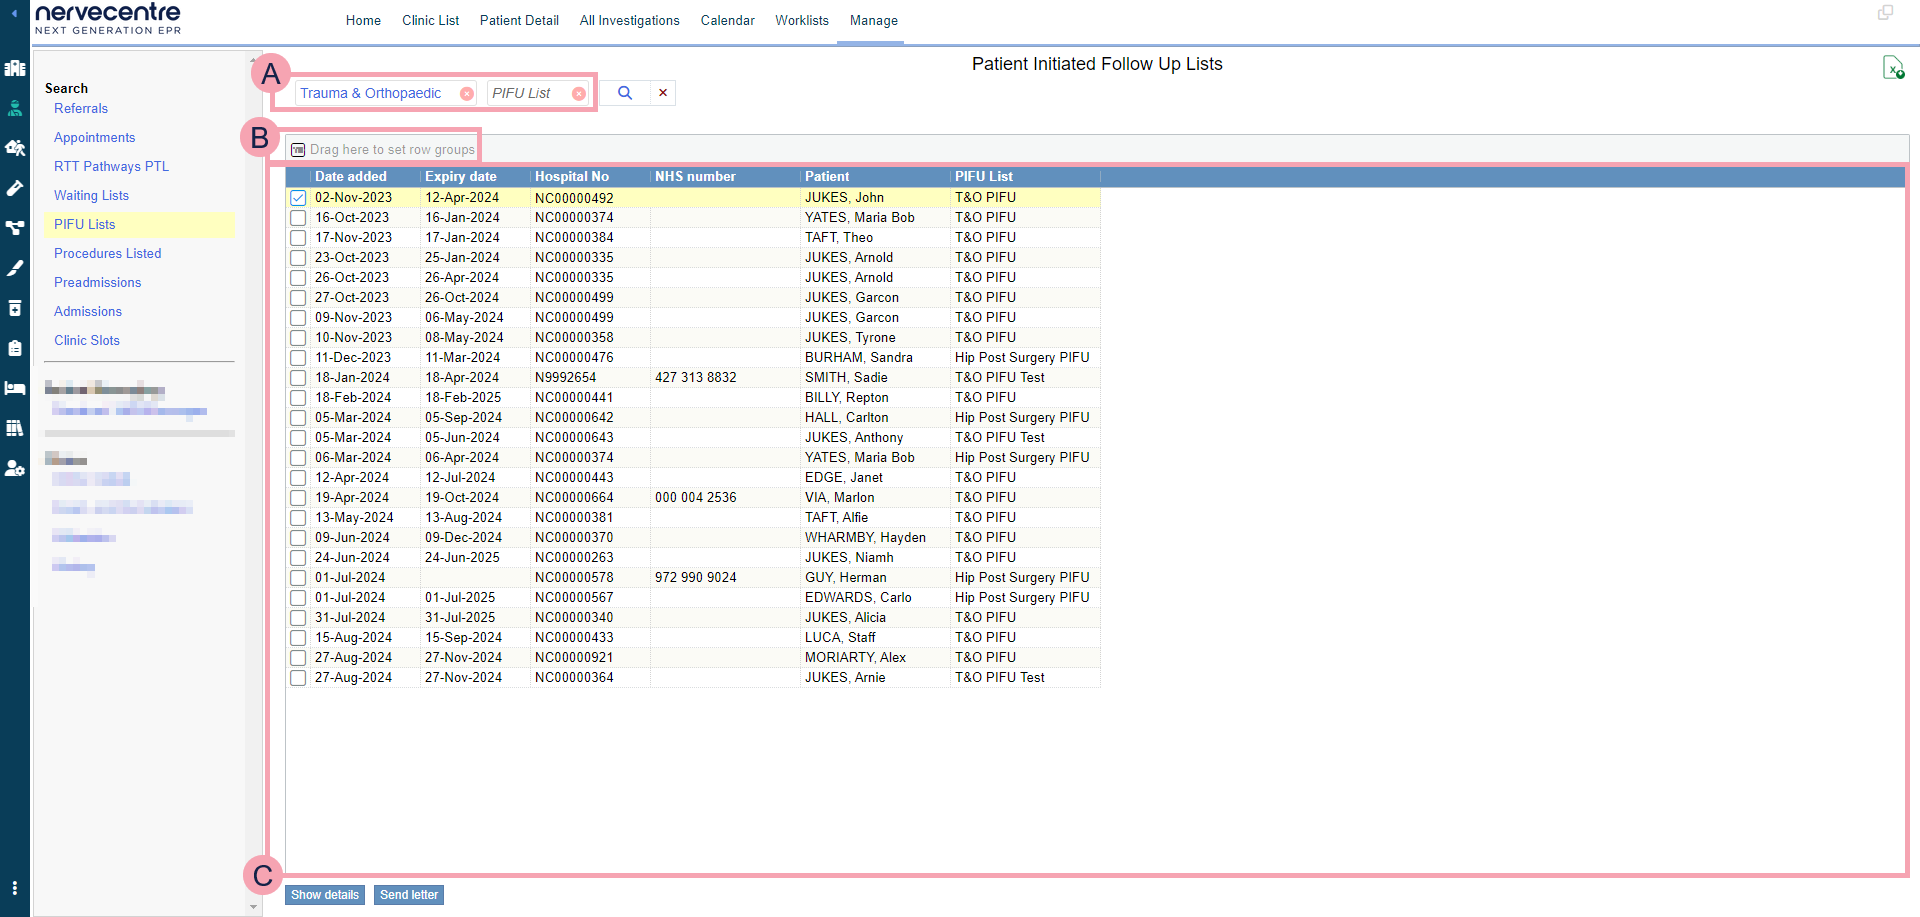
Overview of Manage > PIFU Lists
From Outpatients > Manage > PIFU Lists, you can view patients with PIFU pathways.
|
|
Here you can select the criteria for your search. To clear one search term, select next to the search term. To clear your whole search, select next to . |
|
|
Select to search. |
|
|
Export the current results to an .xlsx file. |
|
|
Drag column headings here to group rows by that heading. Select next to the name of a group to remove it. |
|
|
Shows the table of data returned by your search. Select a column heading to sort the data by that heading. Read more about sorting the contents of a column Double-click on a patient to view their PIFU pathways. |
|
Show details |
Select to view details about a PIFU pathway. |
|
Send letter |
Select to send an ad hoc letter to one or more patients. |


 Sending ad hoc letters to multiple patients
-
From Outpatients > Manage > PIFU Lists, select your search criteria.
-
Select .
-
Select one or more patients.
-
Select Send letter.
-
Select a letter you want to send.
The following appear:
-
The name of the letter
-
The recipient of the letter
-
How the letter is delivered
-
When Nervecentre sends the letter
For example, immediately, at a set time, or after a delay.
-
Any attachments automatically added to the letter
-
-
Optional: edit the name of the letter.
-
To preview a letter:
-
From Preview for, select a patient to preview the letter for that patient.
-
Select Preview.
-
-
To edit the letter, select Editor.
-
To add attachments to the letter:
-
Select .
-
Search for an attachment, or browse folders until you find an attachment.
-
Select an attachment.
-
Select .
-
Select outside the dialogue box.
-
To save the attachments you added, select Yes.
-
-
To sign a letter, or to remove a signature from a letter:
-
From Preview for, select a patient to preview the letter for that patient.
-
Select Preview.
-
Select Sign off.
-
Select an option.
-
To sign the letter with your name, select Sign.
-
To sign the letter for someone else, select Sign as, then select their name.
-
To remove a signature from the letter, select Un-sign.
-
-
-
Send the letter.
-
To send the letter after any specified delay, select Send.
-
To send the letter immediately with no delay, select Send without Delay.
-
Did you find this article helpful? Yes No
Sorry about that. Our help is a work in progress and we welcome any feedback.
Why wasn't this helpful? Please select one reason:
Great!
Thanks for taking the time to give us some feedback.